Social icons

Breville Smart Oven Air Fryer vs Air Fryer Pro - I Wish I Knew This Before Buying! (Honest Review)


YouTube thumbnail
Click below to see the video:


Links to everything I mentioned are available here: [link].


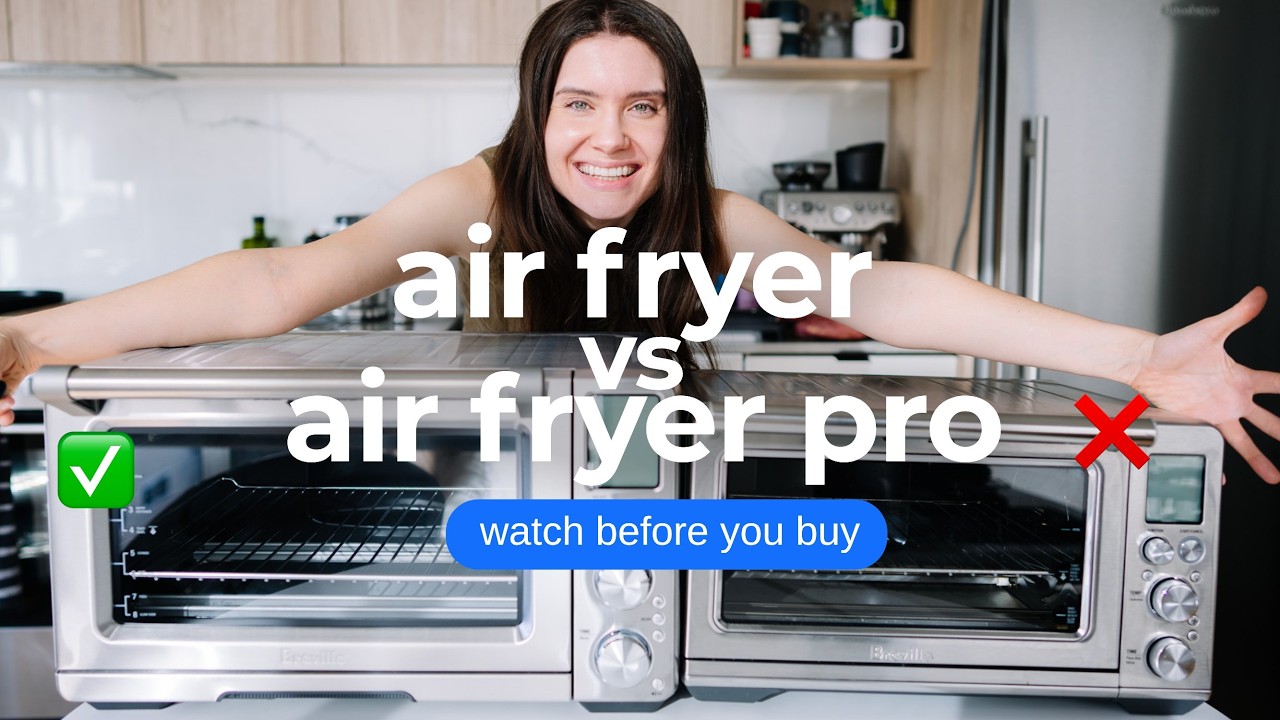
Breville Smart Oven Air Fryer Pro vs Standard: Honest Review and Comparison

After using both Breville air fryer models for years, I've discovered some major differences that most reviews completely miss. If you're deciding between the Breville Smart Oven Air Fryer and the Pro model, this comparison will save you from making the same mistakes I did.


The Real Differences Beyond Dehydrate and Proof Modes

Everyone talks about how the Pro model adds dehydrate and proof functions, but honestly? That's not the real story here. I've been using my standard Breville Smart Oven Air Fryer for over 4 years, and when I finally got my hands on the Pro model, the differences were way more significant than I expected.

The Pro model isn't just bigger (though it definitely is). The build quality, design details, and daily usability are completely different. We're talking about features that actually matter for everyday cooking, not just extra modes you might use once in a while.


Cleaning Nightmare: Why the Standard Model Drives Me Crazy

Let me be brutally honest about the biggest issue with the standard model: cleaning is a absolute nightmare. If you cook anything greasy (which, let's be real, is most good food), the whole interior gets covered in oil that turns brown and becomes impossible to remove.

I've tried everything - different cleaning pastes, S.O.S. sponges, you name it. The problem is that you can't use harsh chemicals because you'll damage the coating. I actually ruined my crumb tray trying to get it clean, and even after hours of scrubbing, it never looked right.

The Pro model completely fixes this problem. The door has way more glass coverage, which is actually the easiest part to clean. The heating elements are accessible for wiping down, unlike the standard model where they're basically unreachable. It's like they learned from all the complaints and completely redesigned the cleaning experience.


Size and Capacity: More Than Just Bigger

The Pro model can fit two air fryer baskets while the standard only fits one. If you're cooking for more than two people or have guests over regularly, this makes a huge difference. The interior is 1 cubic foot, which means you can actually fit a 14-pound turkey or most 9x13 pans.

But here's what's interesting - the external size difference isn't that dramatic. It's taller, wider, and slightly deeper, but it still fits in the same counter space as my old one.


Noise Levels and Static Issues

This is something I never see mentioned in other reviews, but the standard model has this annoying static noise whenever it's running. It's quiet, but it's there, and after a while it really gets on your nerves (especially if you're recording videos like I do).

I actually contacted Breville about it, and they replaced my unit twice. Same issue every time, so I think it's just inherent to that model. The Pro model? Dead silent. No static, no weird buzzing, just smooth operation.

Plus, the Pro model has a volume control button! You can actually adjust how loud the alerts are, which is amazing if you're cooking early in the morning or late at night.


Control Design and User Experience

The control knobs on the Pro model are completely different. With the standard model, I constantly overshoot the setting I want - the knobs just don't have good precision. The Pro model knobs feel more substantial and give you better control.

The LCD display is also clearer and more intuitive. Small details, but when you're using something every single day, these things add up.


Temperature Accuracy and Performance

Both models use Breville's Element iQ technology, but the Pro has 6 independent quartz heating elements versus 5 in the standard model. In practice, this means more even heating and better temperature control.

I've tested both with an oven thermometer, and when they say 350 degrees, they actually maintain 350 degrees. This is so much better than my regular oven, which is all over the place temperature-wise.


Is the Pro Model Worth the Extra Cost?

I paid full price for my Pro model (around $400 plus tax), and honestly? Worth every penny. The easier cleaning alone would have justified the upgrade for me. Add in the quieter operation, better build quality, and improved user experience, and it's a no-brainer.

If you're choosing between these two models, get the Pro. If you already have the standard model and cleaning drives you crazy like it did me, the upgrade might be worth considering.

I use these ovens literally every single day for everything from toast to full dinners, and the Pro model just makes the whole experience so much better. Sometimes those extra $50 really do make a difference.

Want to see the full comparison in action? Check out my detailed video review above where I show you all these differences side by side, including the cleaning issues and design improvements that make such a big difference in daily use.

The information in this post is based on my personal experience using both products over several years. Your results may vary depending on usage patterns and individual preferences.

AER Travel Pack 3 vs City Pack 2 Ultra vs Tech Sling 3 X-Pac - Which One Should You Buy?


YouTube thumbnail
Click below to see the video:


Links to everything I mentioned are available here: [link].


AER Backpack Review: Travel Pack 3 vs City Pack 2 Ultra vs Tech Sling 3 - Which One Should You Buy in 2025?

Choosing the right AER backpack can be overwhelming with so many premium options available. After extensive testing of three popular AER bags - the Travel Pack 3, City Pack 2 Ultra, and Tech Sling 3 X-Pac - we've created this comprehensive comparison to help you make the best decision for your needs and budget.


AER Travel Pack 3: The Ultimate Travel Companion

The AER Travel Pack 3 stands out as the largest option in this comparison, designed specifically for travelers who need maximum storage capacity. This backpack easily accommodates both a 16-inch MacBook Pro and a 14-inch work laptop simultaneously, plus additional gear like a Steam Deck and clothing for extended trips.

Key features include three separate compartments for organized packing, a dedicated laptop section, and durable construction that withstands daily abuse. After over a year of consistent use across domestic and international flights, this backpack maintains its professional appearance and structural integrity. The main drawback is its heavier weight compared to other options, making it less ideal for minimalist packers.


AER City Pack 2 Ultra: Lightweight Performance for Professionals

The City Pack 2 Ultra revolutionizes everyday carry with its ultra-lightweight fabric that feels almost weightless while maintaining durability. This backpack targets professionals who prioritize portability without sacrificing functionality for work essentials.

Despite its compact appearance, the City Pack 2 Ultra still accommodates both 14-inch and 16-inch MacBooks in its dedicated laptop compartment. The wide-opening design provides easy access to contents, while multiple organizational pockets keep smaller items secure. However, space limitations mean you'll need to choose carefully what to pack - bulky items like thick hoodies may not fit comfortably.


AER Tech Sling 3 X-Pac: Surprising Capacity in a Single-Strap Design

The Tech Sling 3 X-Pac challenges expectations by fitting a 14-inch MacBook Pro in what appears to be a compact sling bag. The striking orange interior adds a modern aesthetic touch while providing excellent visibility for contents.

This versatile carry option works perfectly for coffee shop sessions, quick errands, or situations where a full backpack feels excessive. Multiple compartments include easy-access pockets for phones and accessories, plus deeper storage for tablets and other electronics. The adjustable single strap allows for comfortable wearing across the chest or over the shoulder.


Which AER Backpack Should You Choose?

Your ideal AER backpack depends on your specific use case and carrying preferences. Choose the Travel Pack 3 if you frequently travel with multiple devices and need maximum storage capacity. The extra weight becomes worthwhile when you can pack everything in one organized bag for flights and extended trips.

Select the City Pack 2 Ultra for daily commuting and office work where weight matters more than maximum capacity. Its professional appearance and lightweight design make it perfect for business environments and public transportation.

Consider the Tech Sling 3 X-Pac for minimal carry situations, coffee shop work, or as a secondary bag for specific occasions. Its unique form factor and surprising capacity make it ideal for users who prefer single-strap convenience over traditional backpack designs.


Final Verdict: Premium Quality Across All Options

All three AER bags deliver exceptional build quality, thoughtful design, and practical functionality that justify their premium pricing. The modular approach allows users to select different bags for different situations rather than compromising with a single option that tries to do everything.

For the complete video review showing detailed demonstrations of each backpack's features and real-world packing tests, watch our comprehensive comparison above. You'll see exactly how each bag performs and get a better sense of their size differences and organizational capabilities.

This review is based on personal experience and testing. This is not sponsored - all Aer bags were purchased with my own money. Individual needs may vary, and we recommend considering your specific use case when making a purchase decision. Some links in this article may be affiliate links, which means we may earn a small commission if you make a purchase through them, at no additional cost to you.

Ultrahuman Ring AIR vs Oura Ring 4 - 30 Day Honest Comparison Review 2025


YouTube thumbnail
Click below to see the video:


Links to everything I mentioned are available here: [link].


In this video I'm sharing my honest comparison after wearing both the Ultrahuman Ring AIR and Oura Ring 4 for over 30 days straight! One costs literally half the price with zero monthly fees, while the other has that premium reputation (but comes with ongoing costs). I tested everything - sleep tracking, activity monitoring, comfort, accuracy, and all those fancy health metrics they both promise. The results might actually surprise you, especially when it comes to which one I'd buy again if I had to choose. If you're torn between these two smart rings or wondering if the cheaper option is actually worth it, this comparison will help you decide without wasting your money! Subscribe: https://bit.ly/3aXtqaz 🎥 my most recent vlog: → https://www.youtube.com/watch?v=pjQkpCX3ozY&list=UULFCWgCP5rY1cEVGGK2bHcY4w&index=1 🔗 links → Smart Rings: Oura Ring 4: https://ift.tt/Ph2Cl3v / https://ift.tt/ryjToUW Ultrahuman Ring AIR: https://ift.tt/F7Je0IQ (Discount code: CAB10, Amazon Discount Code: AMZCAB10 - applicable only for US Amazon) Amazon Ultrahuman Link: https://amzn.to/4hYMdpP → Ring Accessories: Silicone Ring Cover for Oura/Ultrahuman Ring AIR (Size S): https://amzn.to/498j5bu Diamond Stackable Ring Eternity Bands for Oura/Ultrahuman Ring AIR: https://amzn.to/498j5bu 🎥 related videos - my smart ring videos: I Wore the Ultrahuman Ring AIR for 365 Days STRAIGHT 👀 Thoughts After 1 Year Review https://www.youtube.com/watch?v=pjQkpCX3ozY 6 MONTHS of UltraHuman AIR Fitness Tracking Ring - In Depth HONEST Review After Months of Daily Use https://www.youtube.com/watch?v=Mh5yFBbqmlA&list=PLH7GEfJeyDbbkbtlpd22zsq3MeS6O8I2S&index=3 UltraHuman AIR Fitness Tracking Ring - In Depth HONEST Review After 3 Months of Daily Use https://youtu.be/hmh8cX6-0Ps All my videos on: Smart Rings 💍🔥 https://www.youtube.com/playlist?list=PLH7GEfJeyDbbkbtlpd22zsq3MeS6O8I2S 👋 you can find me here http://juliacaban.com instagram: https://ift.tt/F1z3OwM tiktok: imjuliacaban subscribe: https://bit.ly/3aXtqaz 👩🏻‍💻 about me I'm Julia and I'm based in Los Angeles, CA 🌴 I make honest tech and gadgets reviews and useful tutorials. If you have any questions, feel free to leave them down below in the comments section - I make sure to reply to you all. I appreciate your support! ✉️ business inquires contactjuliacaban@gmail.com ⏳ timestamps 0:00 30 days wearing both rings 0:24 Price comparison and membership fees 1:10 Comfort and fit differences 1:56 Features both rings track 2:27 Oura Ring exclusive features 3:09 Activity tracking accuracy comparison 4:36 Stress tracking limitations to consider 4:53 Sleep tracking performance 5:18 Activity tracking detailed comparison 5:42 Final recommendation and conclusion 7:01 Long-term testing results 🔎 video topics oura, ultrahuman, oura ring 4 review, ultrahuman air review, smart ring comparison, sleep tracking, fitness tracker, wearable technology, oura vs ultrahuman, smart ring 2025, health monitoring, heart rate tracking, temperature tracking, cycle tracking, natural cycles, stress monitoring, apple watch alternative, fitness gadgets, sleep optimization, wellness tracker, ring sizing, battery life, subscription free ultrahuman ring air review, oura ring 4 comparison, smart ring comparison 2025, fitness tracker rings, sleep tracking ring, ultrahuman vs oura, best smart ring, smart ring no subscription, budget smart ring, oura ring alternatives, health tracking ring, fitness ring review, wearable technology, smart jewelry, sleep monitor ring, activity tracker ring, heart rate ring, temperature tracking ring, smart ring for women, cycle tracking ring, natural cycles app, smart ring accuracy, fitness tracker comparison, ultrahuman discount code ❗️disclaimer FTC: This video is NOT sponsored. All opinions expressed are my own. In order to support my channel, I share affiliate links, which means I earn a small commission if you make a purchase through them, however, this does not affect how much the item costs you. As an Amazon Associate, I earn from qualifying purchases. That being said, I only promote products that I genuinely stand by. 📽 gear Camera - https://amzn.to/3OZZlhj Lens - https://amzn.to/41Cfwqi 2nd Lens - https://amzn.to/3DlrZ5u 3rd Lens - https://amzn.to/3IP7QGa Lights - https://amzn.to/3BW0L3W Microphone Kit - https://ift.tt/Uh2Ps5o (mic) + https://ift.tt/1nRc20k (cable) + https://amzn.to/3P9qdeW (mount) Royalty-free Music - https://bit.ly/3LeY1W6 thanks for watching ❤️

PLASMA PEN SETTINGS I Actually Use


YouTube thumbnail
Click below to see the video:


Links to everything I mentioned are available here: [link].


Plasma Pen Settings: What Power Levels Actually Work (From Someone Who's Tested Them)

If you're wondering what plasma pen settings to use, you're not alone. This is literally the most asked question I get about plasma pens, and honestly, there's so much confusing information out there that I had to make a video about it. After years of testing different power levels (and learning some lessons the hard way), I'm sharing the exact settings that actually work without causing weeks of healing time. There are different settings for different devices, but these ones are for the Snow Skin Plasma Pen only.


The Truth About Plasma Pen Power Settings

Most plasma pens have settings from 0 to 9, but here's what nobody tells you: you don't need to use the highest settings to get great results. In fact, using settings that are too high can cause serious problems that take weeks to heal instead of days.

The sweet spot for most people? Settings 4 or 5. I know it sounds low, but trust me on this one. I've tested everything from level 1 to level 7, and these medium settings give you the best results with the least risk.


Why I Never Go Above Setting 7 (And You Shouldn't Either)

Here's my honest experience: I once used a higher setting thinking it would work faster, and it took my skin weeks to heal instead of the usual few days. The scarring risk just isn't worth it, especially when medium settings work perfectly fine.

My maximum setting is level 7, but I've only used that twice in years of experience. For 99% of treatments, stick to 4 or 5, but always start with the lowest 1 setting first. Your skin will thank you later.


The LED Light Feature Everyone Ignores

Most plasma pens have an LED light feature that you activate by double-tapping a button. Use it! This light helps you see skin spots and imperfections much more clearly, making your treatments more precise and effective.

It's one of those simple features that makes a huge difference in your results, but so many people skip it because they don't know it exists.


Practice on Fruit First (This Changed Everything for Me)

Before you even think about using a plasma pen on your skin, practice on fruit. I know it sounds weird, but this technique completely changed my confidence with the device. Use the lowest setting (0) and practice on an apple or orange to get comfortable with the distance and technique.

This simple practice method helps you understand how the device works without any risk to your skin. It's what professionals recommend, and it's what I wish I had done from the beginning.


The Biggest Mistake People Make With Plasma Pen Settings

The biggest mistake? Going too high too fast. I see people jumping straight to level 8 or 9 thinking higher means better results. That's not how plasma pens work.

Start low, see how your skin responds, and only increase if absolutely necessary. Most of the time, you won't need to go higher than 5. Remember: you can always do another treatment, but you can't undo overtreatment.


My Step-by-Step Setting Recommendations

Here's exactly what I recommend for different experience levels:

Complete beginners: Start at lowest setting available, practice on fruit until comfortable
New to plasma pens: Use setting 2-3 for first real treatments
Some experience: For me, setting 4-5 is my sweet spot
Very experienced users only: Setting 6-7, but I would never go higher. The risk simply isn't worth it.


Safety Tips That Could Save Your Skin

Always use the LED light feature for better visibility. Don't rush between applications - give yourself time to assess how the skin looks after each treatment. If you see white spots forming, you're going too deep and need to lower the setting immediately.

Most importantly, if something doesn't look right, stop the treatment. It's better to do multiple sessions at lower settings than to overdo it in one session and deal with weeks of healing.


Watch My Complete Plasma Pen Settings Tutorial

I demonstrate all of these settings and techniques in my detailed video. You'll see exactly how to adjust the power levels, activate the LED light, and use the proper technique that minimizes healing time while maximizing results.

The video shows real demonstrations of each setting level and explains when to use each one. If you're serious about getting the best results from your plasma pen safely, this tutorial covers everything you need to know.


This content is not medical advice. Consult professionals first. Plasma pens can cause serious injuries. Use at your own risk.